Primeng Loading Bar


In Angular, it is common practice to execute commands prior routing a page using guards and resolvers. Guards prevent the routing from occuring until the condition turns to true and resolvers prevent the routing from occuring until the data is returned. Those actions can take time to complete and during the time being, the component will not load leaving the user with an impression of unresponsiveness. Today we will see how we can implement a navigation loading bar for Angular using PrimeNG progress bar component.
If you are unfamiliar with the Angular router, you can have a look at my previous blog post explaining the feature of the router https://kimsereyblog.blogspot.com/2017/06/how-to-use-angular-router.html.
Setup an Angular Project
We start by creating a project and installing PrimeNG.
1
2
npm install primeng --save
npm install primeicons --save
Next we also install Bootstrap to use the nav style:
1
npm install bootstrap --save
Then in the styles in angular.json we add the style files:
1
2
3
4
5
6
7
8
"styles": [
    "src/styles.css"
    "src/styles.css",
    "node_modules/primeicons/primeicons.css",
    "node_modules/primeng/resources/themes/omega/theme.css",
    "node_modules/primeng/resources/primeng.min.css",
    "node_modules/bootstrap/scss/bootstrap.scss"
]
Next we modify app.component.ts to add the nav bar.
1
2
3
4
5
6
<nav class="navbar navbar-expand-md navbar-dark bg-dark">
    <a class="navbar-brand" href="#">Navbar</a>
</nav>

<h1>My App</h1>
<router-outlet></router-outlet>
We added <router-outlet></router-outlet> to specify where the content of the route will be displayed. We then add a simple route in app.module.ts.
1
2
3
4
5
6
7
8
9
10
11
12
13
14
15
16
17
18
19
20
21
22
23
24
25
const appRoutes: Routes = [
  {
    path: '',
    component: MyComponent
  }
];

@NgModule({
  declarations: [
    AppComponent,
    MyComponent
  ],
  imports: [
    BrowserModule,
    BrowserAnimationsModule,

    RouterModule.forRoot(
      appRoutes,
      { enableTracing: false }
    )
  ],
  providers: [],
  bootstrap: [AppComponent]
})
export class AppModule { }
We then create an empty component called MyComponent which will be used to represent the content of the page.
1
2
3
4
5
6
7
8
import { Component } from '@angular/core';

@Component({
  template: `
    <div>Hello world</div>
  `
})
export class MyComponent { }
In order to replicate a delay due to a guard, we add a guard which takes 5 seconds to load:
1
2
3
4
5
6
7
8
9
10
11
12
13
14
15
16
import { Injectable } from "@angular/core";
import { CanActivate, ActivatedRouteSnapshot, RouterStateSnapshot } from "@angular/router";
import { TestService } from "./test.service";
import { delay } from "rxjs/operators";
import { of } from "rxjs";

@Injectable({
    providedIn: 'root'
})
export class DelayGuard implements CanActivate {
  constructor(private service: TestService) {}

  canActivate(route: ActivatedRouteSnapshot, state: RouterStateSnapshot) {
      return of(true).pipe(delay(5000));
  }
}
We then add it to the route:
1
2
3
4
5
6
7
{
    path: '',
    component: MyComponent,
    canActivate: [
        DelayGuard
    ]
}
Once we navigate to localhost:4200, we now have to wait five seconds before seeing the content of the component.
PrimeNG Progress Bar
To start using the progress bar we need to import the module from PrimeNG:
1
2
3
4
5
6
7
8
9
10
11
import { ProgressBarModule } from 'primeng/progressbar';


@NgModule({
  imports: [
    ProgressBarModule
  ],
  ...
})
export class AppModule { }
We can then create a component using the progress bar:
1
2
3
4
5
6
7
8
9
10
11
12
import { Component, Input } from '@angular/core';
import { Router, NavigationStart, NavigationEnd } from '@angular/router';
import { filter, map } from 'rxjs/operators';

@Component({
  selector: 'app-progress-bar',
  template: `
    <p-progressBar mode="indeterminate"></p-progressBar>
  `
  ]
})
export class ProgressBarComponent { }
indeterminate correspond to a progress bar which animates but does not have any definite ending. The official documentation can be found here. If we want to stop the animation, we can set the mode to '' (empty string). So what we can do is to set the mode to indeterminate when navigation is initiated and set it to '' when navigation ends.
1
2
3
4
5
6
7
8
9
10
11
12
13
14
15
16
17
18
import { Component, Input } from '@angular/core';
import { Router, NavigationStart, NavigationEnd } from '@angular/router';
import { filter, map } from 'rxjs/operators';

@Component({
  selector: 'app-progress-bar',
  template: `
    <p-progressBar mode="{{ mode$ | async }}"></p-progressBar>
  `
})
export class ProgressBarComponent {
    mode$ = this.router.events.pipe(
        filter(evt => evt instanceof NavigationStart || evt instanceof NavigationEnd),
        map(evt => evt instanceof NavigationStart ? 'indeterminate' : '')
    );

    constructor(private router: Router) { }
}
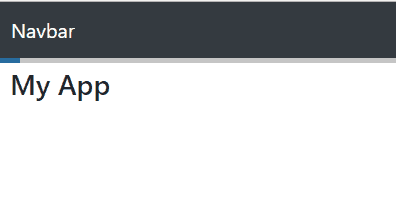
We achieve that by subscribing to the router events and filtering NavigationStart and NavigationEnd where we set the mode as indeterminate when navigation starts and '' when it ends. We can then place it just below a navbar so that it looks part of the design.
1
2
3
4
5
6
7
8
<nav class="navbar navbar-expand-md navbar-dark bg-dark">
    <a class="navbar-brand" href="#">Navbar</a>
</nav>

<app-progress-bar></app-progress-bar>

<h1>App component</h1>
<router-outlet></router-outlet>
We also touch slightly on its style by using the class selector :host combined with ::ng-deep to target classes within the component it is defined. If we did not use those selectors, we will not be able to target the classes from PrimeNG due to the mechanism used to isolated style classes from different components.
1
2
3
4
5
6
7
8
9
10
11
12
13
14
15
16
17
18
19
20
21
22
23
24
25
26
27
28
29
30
31
32
33
34
import { Component, Input } from '@angular/core';
import { Router, NavigationStart, NavigationEnd } from '@angular/router';
import { filter, map } from 'rxjs/operators';

@Component({
  selector: 'app-progress-bar',
  template: `
    <p-progressBar mode="{{ mode$ | async }}"></p-progressBar>
  `,
  styles: [`
    :host ::ng-deep .ui-progressbar {
        height: 4px;
        background: #c5c5c5;
    }`, `
    :host ::ng-deep .ui-widget-header {
        border: none;
    }`, `
    :host ::ng-deep .ui-widget-content {
        border: none;
    }`, `
    :host ::ng-deep .ui-corner-all {
        border-radius: 0;
    }
    `
  ]
})
export class ProgressBarComponent {
    mode$ = this.router.events.pipe(
        filter(evt => evt instanceof NavigationStart || evt instanceof NavigationEnd),
        map(evt => evt instanceof NavigationStart ? 'indeterminate' : '')
    );

    constructor(private router: Router) { }
}
And we are done! We now have a working progress bar.
Conclusion
Today we saw how to create a progress bar for Angular using PrimeNG. We bound the progress bar animation to the navigation of the Angular router and saw how to style a component and component used within it using :host and ::ng-deep. Hope you liked this post, see you next time!


