Local Jenkins With Docker

CI/CD pipelines allow us to automatically build, test and deploy code changes. With Jenkins pipeline, the pipeline itself is generated from a file called the Jenkinsfile which, usually, is source controlled together with the source code repository. When we need to push new changes, what we would usually do, is test locally and then commit to the repository. From there, the Jenkins pipeline will trigger and build, test on the integration server and deploy to a testable environment (DEV/QA). But what do we do when the changes that we are making are on the Jenkinsfile itself? How do we test locally the validity of the Jenkinsfile or more simply, how do we try on a sandbox a Jenkins pipeline to learn how to write a Jenkinsfile? Today we will see how we can setup a sandbox with a full CI/CD deployment which can be quickly brought up and teared down for testing.
Jenkins server via docker
We assume that docker Windows is installed. If you don’t have docker, you can refer to my previous post. In our example, we will be building a dotnet application which will run on a Linux container. We start first by building a dockerfile which will generate an image containing the following:
- Jenkins served on 8080
- curl installed
- .NET Core SDK to build our application on Jenkins
1
2
3
4
5
6
7
8
9
10
11
12
13
14
15
16
17
18
19
20
21
22
23
24
25
26
27
28
29
30
31
32
33
34
35
36
37
38
39
FROM jenkins/jenkins:lts
USER root

# Install .NET CLI dependencies
RUN apt-get update \
    && apt-get install -y --no-install-recommends \
        libc6 \
        libgcc1 \
        libgssapi-krb5-2 \
        libicu57 \
        liblttng-ust0 \
        libssl1.0.2 \
        libstdc++6 \
        zlib1g \
    && rm -rf /var/lib/apt/lists/*

# Install .NET Core SDK
ENV DOTNET_SDK_VERSION 2.1.403

RUN curl -SL --output dotnet.tar.gz https://dotnetcli.blob.core.windows.net/dotnet/Sdk/$DOTNET_SDK_VERSION/dotnet-sdk-$DOTNET_SDK_VERSION-linux-x64.tar.gz \
    && dotnet_sha512='903a8a633aea9211ba36232a2decb3b34a59bb62bc145a0e7a90ca46dd37bb6c2da02bcbe2c50c17e08cdff8e48605c0f990786faf1f06be1ea4a4d373beb8a9' \
    && sha512sum dotnet.tar.gz \
    && echo "$dotnet_sha512 dotnet.tar.gz" | sha512sum -c - \
    && mkdir -p /usr/share/dotnet \
    && tar -zxf dotnet.tar.gz -C /usr/share/dotnet \
    && rm dotnet.tar.gz \
    && ln -s /usr/share/dotnet/dotnet /usr/bin/dotnet

# Configure Kestrel web server to bind to port 80 when present
ENV ASPNETCORE_URLS=http://+:80 \
    # Enable detection of running in a container
    DOTNET_RUNNING_IN_CONTAINER=true \
    # Enable correct mode for dotnet watch (only mode supported in a container)
    DOTNET_USE_POLLING_FILE_WATCHER=true \
    # Skip extraction of XML docs - generally not useful within an image/container - helps performance
    NUGET_XMLDOC_MODE=skip

# Trigger first run experience by running arbitrary cmd to populate local package cache
RUN dotnet help
We start from the official Jenkins image jenkins/jenkins:lts and copy the content of the latest dotnet image from microsoft/dotnet:2.1-sdk to install dotnet.
You can replace the runtime with any runtime you’d like to run your application in, in here I am compiling an ASP NET Core application therefore am installing dotnet.
To build the image we use docker build [PATH]. The context is all the files under the PATH specified, to avoid sending unnecessary files, we create a .dockerignore file which works the same as a .gitignore file.
1
2
.vscode
jenkins_home
Here we exclude .vscode and jenkins_home folders which aren’t necessary to build the image.
After having that we can then build the image and call it jenkins-test by running the following:
1
docker build -f .\Dockerfile -t jenkins-test .
Lastly we can create and run a container using the newly built image:
1
2
3
4
5
6
7
if not exist "C:\Projects\jenkins-pipeline-test\jenkins_home" mkdir C:\Projects\jenkins-pipeline-test\jenkins_home

docker run -p 8080:8080 -p 50000:50000 ^
    -v C:/Projects/jenkins-pipeline-test/jenkins_home:/var/jenkins_home ^
    -v C:/Projects:/var/projects ^
    -v /var/run/docker.sock:/var/run/docker.sock ^
    --name jenkins-test jenkins-test
Before we create and start the container, we make sure that jenkins_home folder is created. This folder will be used to persist the data of Jenkins including users, credentials and pipelines.
We bind multiple volumes:
C:/Projects/jenkins-pipeline-test/jenkins_home:/var/jenkins_homewill bind thejenkins_homeas explained to persist jenkins dataC:/Projects:/var/projectswill provide access to the projects to build, assuming thatC:/Projectsis where your project lives else place your own directory/var/run/docker.sock:/var/run/docker.sockwill allow the Jenkins container to send command via unix-socket to the docker host, we will see more in 3)
After running the container, we now have a full version of Jenkins will run and we can do the initial setup to create a user account and install default plugins including Jenkins Pipeline.
Jenkins pipeline
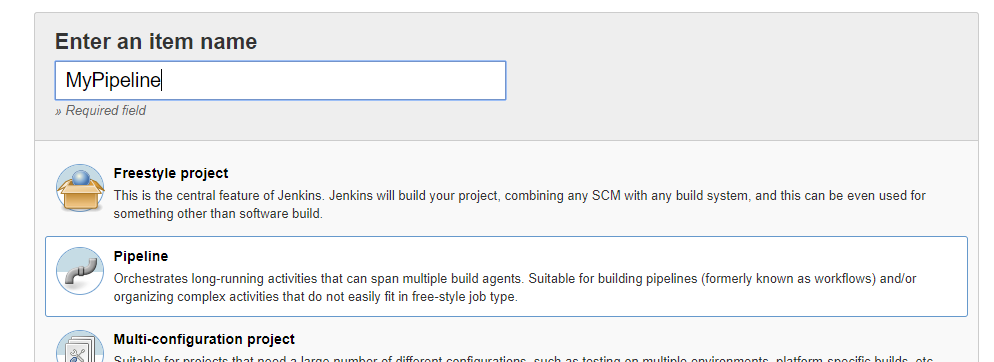
Jenkins UI can be accessed from http://localhost:8080. After having done the initial setup we can start by creating a pipeline. Here we will be setting up a pipeline that builds our local git project. So we start first by creating the pipeline:
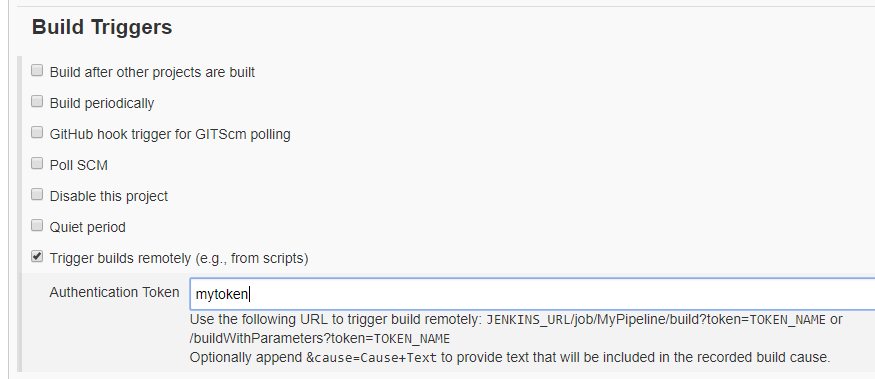
Under Build Triggers, we select Trigger builds remotely to allow the pipeline to be triggered via http GET.
Then under Advanced Project Options, we select Pipeline script from SCM with SCM Git and for repository URL, we provde the file URI to our repository:
1
file:///var/projects/HelloWorldJenkins/
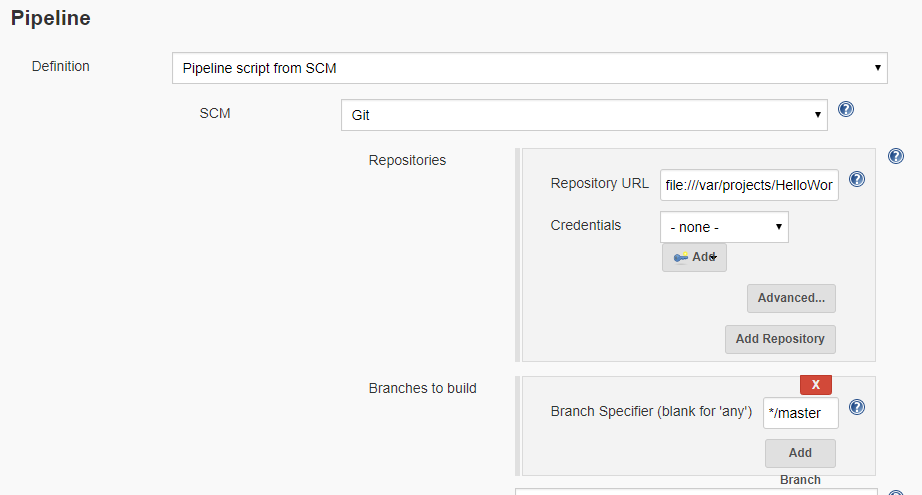
The project should be available on the Jenkins container as we have shared the volume -v C:/Projects:/var/projects in 1).
Lastly to trigger automatically the pipeline at each commit, we add a post-commit hook under .git/hooks/ with the following:
1
2
#!/bin/sh
curl -u kimserey:12345 http://localhost:8080/job/TestPipeline/build?token=mytoken
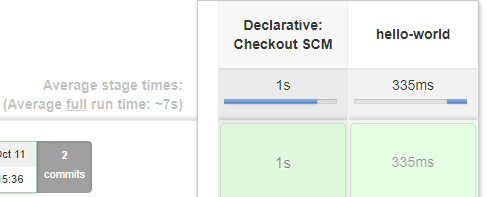
Lastly in our project, we can create a Jenkinsfile which will contain a single hello world stage:
1
2
3
4
5
6
7
8
9
10
11
pipeline {
    agent any

    stages {
        stage('hello-world') {
            steps {
                echo "hello world"
            }
        }
    }
}
Simulate deployment to server
So far we have Jenkins running locally and being triggered by commits from our local repository. Now to simulate a full CI/CD scenario, we can simulate a deployment of application on a server by spinning up a container with our application deployed.
The docker CLI is an interface talking to the underlying docker Engine which is a REST API. Since our Jenkins runs in a container, it’s not possible to use the docker CLI but what we can do instead is to submit HTTP request to the unix-socket that the Docker host listen on. And we enabled that by sharing the socket earlier in 1) using -v /var/run/docker.sock:/var/run/docker.sock.
In the Jenkinsfile, we can add sh steps which will curl the unix-socket.
1
2
3
4
5
6
7
8
sh "touch artifact.tar"
sh "tar --exclude=artifact.tar --exclude=.git* --exclude=./test* --exclude=.vs* -cvf artifact.tar ."
sh	"""
    curl --unix-socket /var/run/docker.sock \
        -X POST -H "Content-Type:application/x-tar" \
        --data-binary '@artifact.tar' \
        http:/v1.38/build?t=hello-world-jenkins
"""
Here we create a tar which will contain the context for the build and submit it via a POST to the API on http:/v1.38/build?t=hello-world-jenkins.
t is used to tag the image.
Note: I had to place my Dockerfile at the root of the folder, else the POST will always fails to find the Dockerfile.
Next we can then delete the current running container:
1
2
3
4
5
sh	"""
    curl --unix-socket /var/run/docker.sock \
        -X DELETE \
        http:/v1.38/containers/hello-world-jenkins?force=1
"""
And then create a new container by passing a json content of the characteristics of the container:
1
2
3
4
5
6
7
sh	"""
    curl --unix-socket /var/run/docker.sock \
        -H "Content-Type: application/json" \
        -d @create-container.json \
        -X POST \
        http:/v1.38/containers/create?name=hello-world-jenkins
"""
The name is passed as a query string as specified by the documentation.
And here is the create-container.json content:
1
2
3
4
5
6
7
8
9
10
11
12
13
{
  "Image": "hello-world-jenkins",
  "HostConfig": {
    "PortBindings": {
      "80/tcp": [
        {
          "HostIp": "0.0.0.0",
          "HostPort": "5000"
        }
      ]
    }
  }
}
We use the image hello-world-jenkins that we created and bind the port 5000 to 80 as the container application listen on 80.
Lastly we can start the container:
1
sh "curl --unix-socket /var/run/docker.sock -X POST http:/v1.24/containers/hello-world-jenkins/start"
Here is the full content of the Jenkinsfile:
1
2
3
4
5
6
7
8
9
10
11
12
13
14
15
16
17
18
19
20
21
22
23
24
25
26
27
28
29
30
31
32
33
34
35
36
37
38
39
40
41
42
43
44
45
46
47
48
49
50
51
52
53
54
55
56
57
58
59
60
61
62
63
64
65
66
67
68
pipeline {
    agent any

    options {
        skipDefaultCheckout true
    }

    stages {
        stage('checkout') {
            steps {
                checkout scm
            }
        }

        stage('build') {
            steps {
                sh "dotnet build src/HelloWorldJenkins"
            }
        }

        stage('test') {
            steps {
                sh "dotnet test test/HelloWorldJenkins.UnitTests"
            }
        }

        stage('build docker image') {
            steps {
                sh "dotnet clean"

                sh "touch artifact.tar"

                sh "tar --exclude=artifact.tar --exclude=.git* --exclude=./test* --exclude=.vs* -cvf artifact.tar ."

                sh	"""
                curl --unix-socket /var/run/docker.sock \
                    -X POST -H "Content-Type:application/x-tar" \
                    --data-binary '@artifact.tar' \
                    http:/v1.38/build?t=hello-world-jenkins
                """
            }
        }

        stage('teardown old container') {
            steps {
                sh """
                curl --unix-socket /var/run/docker.sock \
                    -X DELETE \
                    http:/v1.38/containers/hello-world-jenkins?force=1
                """
            }
        }

        stage('deploy new container') {
            steps {
                sh """
                curl --unix-socket /var/run/docker.sock \
                    -H "Content-Type: application/json" \
                    -d @create-container.json \
                    -X POST \
                    http:/v1.38/containers/create?name=hello-world-jenkins
                """

                sh "curl --unix-socket /var/run/docker.sock -X POST http:/v1.24/containers/hello-world-jenkins/start"
            }
        }
    }
}
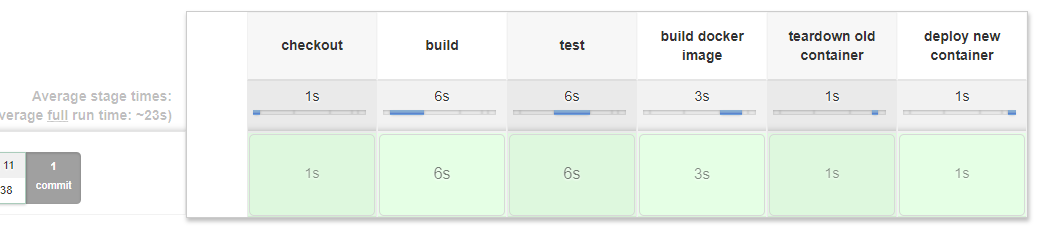
Once done, our application can then access localhost:5000 and see the Hello World default message!
Clean everything
Laslty once we are done with our testing, we can simply kill the containers and delete them together with the images:
1
2
3
4
docker container rm -f jenkins-test
docker image rm jenkins-test
docker container rm -f hello-world-jenkins
docker image rm hello-world-jenkins
And our machine is cleaned up from everything!
The source code can be found on my GitHub:
- https://github.com/Kimserey/local-jenkins-docker - Pipeline code, clone the repository and build/run the container directly to start a fresh Jenkins.
- https://github.com/Kimserey/hello-world-jenkins - Project code, clone the repository and setup the git hook to trigger the pipeline.
Conclusion
Today we saw how to setup a fully functional CI/CD pipeline with Jenkins and deployment via docker. This is meant to be used for local development to try and discover the possibilities of Jenkins pipeline. It can also be used to test your docker containers locally. In this post we started by looking into how to setup Jenkins locally via Docker container. Then we moved to setting up the pipeline itself to enable continuous integration and we finished by setting up a pipeline which would deploy a container with our application to imitate what a CI/CD pipeline would do for an application. From this setup, we can now easily test code on Jenkinsfile with pipelines locally without affecting our deployed setup. Hope you liked this post, see you next time!


