Create A Blog With Jekyll

Jekyll is a blog aware static site generator. Blog aware means that it ships with functionalities to build blogs and blog posts. The two major benefits from Jekyll are the markdown translation to HTML and its blog creation orientation. I recently migrated out of blogger and moved to building my own website using Jekyll and today I will share the steps I took.
The official website of Jekyll can be found here.
The source code of this post can be found on my GitHub.
Install Jekyll
The first step is to install Ruby and Jekyll.
1
2
3
4
5
6
7
sudo apt-get update -y && sudo apt-get upgrade -y
sudo apt-add-repository ppa:brightbox/ruby-ng
sudo apt-get update
sudo apt-get install ruby2.5 ruby2.5-dev build-essential dh-autoreconf
sudo gem update
sudo gem install jekyll bundler
bundle config path vendor/bundle
Now we can verify that Ruby and Jekyll are installed properly:
1
2
3
4
5
6
7
8
$ bundle -v
Bundler version 1.17.2

$ gem -v
2.7.6

$ jekyll -v
jekyll 3.8.5
We start first by creating a folder myblog which will contain the content of the blog.
1
2
mkdir myblog
cd myblog
We then add a Gemfile and an index.html file:
1
2
3
/myblog
 - Gemfile
 - index.html
In the index.html we put the following empty HTML page:
1
2
3
4
5
6
7
8
9
<!doctype html>
<html>
  <head>
    <title>Hello</title>
  </head>
  <body>
    Hello World
  </body>
</html>
And in the Gemfile:
1
2
3
4
5
6
7
source 'https://rubygems.org'

gem 'jekyll'

group :jekyll_plugins do
  gem 'jekyll-sitemap'
end
This Gemfile specifies that the current project needs jekyll and jekyll-sitemap packages. All Jekyll plugins have to be placed under the bundler group jekyll_plugins. We then run bundle install to install everything and serve in the context of the bundler with bundle exec jekyll serve.
1
2
$ bundle install
$ bundle exec jekyll serve
If we navigate to localhost:4000, we will see our Hello page. This confirms that Jekyll is installed properly and that it is able to generate a static site.
We can now start to build a blog using Jekyll concepts:
Layoutsto create similar pages where only the content changes,Includesto create reusable components which can be included anywhere in a page,Datato configure data in a yaml format which can then be used to modify pages content without touching the pages code,Postswhich holds all blog posts.
Layouts
We start first by creating a main layout which we place under _layouts:
1
2
3
4
/_layouts
  - main.html
- Gemfile
- index.html
We then shift the code from index.html to main.html:
1
2
3
4
5
6
7
8
9
10
11
12
<!doctype html>
<html>

<head>
  <title>{{ page.title }}</title>
</head>

<body>
{{ content }}
</body>

</html>
Jekyll uses the Liquid template language as a markup language. Therefore here we replaced the title with {{ page.title }} and the content of the body with {{ content }}.
The index.html page then becomes:
1
2
3
4
5
---
layout: main
title: Hello!
---
Hello World
The top section delimited by three dashes --- is the YAML Front matter (YFM) which allows to specify variables which will then be available in layouts or includes. layout variable is a predefined variable specifying the layout Jekyll should use to render this page. Our index.html needs the main.html layout.
Layouts can also be composed, for example we can have a default layout and main layout which would be using default as layout.
For example we add default.html
1
2
3
4
5
6
7
8
9
10
11
12
<!doctype html>
<html>

<head>
  <title>{{ page.title }}</title>
</head>

<body>
{{ content }}
</body>

</html>
And for main.html:
1
2
3
4
5
6
---
layout: default
---
<div class="container">
  {{ content }}
</div>
And we can see that the title defined in YFM of index.html bubbles up and can be used displayed by default layout.
Includes
Includes are component which can be reuse throughout the site. They are placed in _includes:
1
2
3
4
5
6
/_includes
  - navbar.html
/_layouts
  - main.html
- Gemfile
- index.html
For example this include component defines a navbar:
1
2
3
4
<div>
  <a href="#">Home</a>
  <a href="#">About</a>
</div>
And we reference it from the default template:
1
2
3
4
5
6
7
8
9
10
11
12
13
<!doctype html>
<html>

<head>
  <title>{{ page.title }}</title>
</head>

<body>
{% include navbar.html %}
{{ content }}
</body>

</html>
{% include navbar.html %} will include the navbar in the default template.
Data
The links on the navbar in the include were hardcoded. We defined multiple anchor tags with the links. It’s possible to make the navbar more generic by extracting the data out of it. We can do that by adding a yml file under _data. We create a nav.yml which will contain the links used in the navbar:
1
2
3
4
5
- name: Home
  url: #

- name: About
  url: #
This data will then be available throughout the site from the variable site.data.nav. We can then modify the navbar.html include to use the data.
1
2
3
4
5
<div>
  {% for link in site.data.nav %}
    <a href="{{ link.url }}">{{ link.name }}</a>
  {% endfor %}
</div>
Blog Posts
Jekyll being a blog aware framework, it knows how to find posts if we place them under /_posts.
1
2
3
4
5
6
7
8
9
/_includes
  - navbar.html
/_layouts
  - default.html
  - main.html
/_posts
  - 2017-01-10-hello-post.md
- Gemfile
- index.html
We create a 2017-01-10-hello-post.md markdown file by following the convention yyyy-mm-dd-title.md. Jekyll will then translate it and use the date as the publish date which it will make it available as a variable under post.date and will translate the title provided as Hello Post and make it available under post.title.
Under post we can then write our post in a Markdown format:
1
2
3
4
---
layout: main
---
This a a test post!
Jekyll generates the post and make them accessible from site.posts therefore we change our index.html to list down the posts:
1
2
3
4
5
6
7
8
9
10
11
12
13
14
---
layout: main
title: Hello!
---

<ul>
  {% for post in site.posts %}
  <li>
    <a href="{{ post.url }}">{{ post.title }}</a>
    <span>{{ post.date | date_to_string }}</span>
    {{ post.excerpt }}
  </li>
  {% endfor %}
</ul>
We are now able to list our blog posts and access them.
SASS
So far we haven’t styled our blog. To add style, we create a style.scss file under /assets/css/styles.scss. We also add a main.scss under /_sass/main.scss and import main from styles.
1
2
3
4
5
/_sass
  - main.scss
/assets
  /css
    - styles.scss
The files under /_sass will be pure scss files. Here is the content of main.scss:
1
2
3
.container {
  background-color: grey;
}
While styles.scss will be processed by Jekyll and transformed to styles.css. In styles.scss, we import main:
1
2
3
---
---
@import 'main';
We saw how to get the site up and working. We can take a step further and start styling the blog using scss. We will use Bootstrap and modify its scss variables to style our site.
We start first by downloading the source files from Bootstrap and place then sass files under _sass/bootstrap. It is ths defaut loading path for sass.
Then we create a main.scss where we import Bootstrap.
1
2
3
---
---
@import 'main';
We have to specify the YFM to indicate to Jekyll to process this file. We then reference the styles.css from default.html layout.
1
2
3
4
5
6
7
8
9
10
11
12
13
14
<!doctype html>
<html>

<head>
  <title>{{ page.title }}</title>
  <link rel="stylesheet" href="/assets/css/styles.css">
</head>

<body>
{% include navbar.html %}
{{ content }}
</body>

</html>
When we serve, we should now have our style applied.
Bootstrap
We seen how to enable sass compilation. Now we will see how to add Bootstrap to leverage the components like the grid and card components to style our blog.
We start first by downloading the source files and we take the files under the /scss folder and place it under /_sass/bootstrap.
1
2
3
4
5
6
7
/_sass
  / bootstrap
    - [everything from the /scss folder of Bootstrap]
  - main.scss
/assets
  /css
    - styles.scss
We can then import bootstrap from main:
1
@import 'bootstrap/bootstrap';
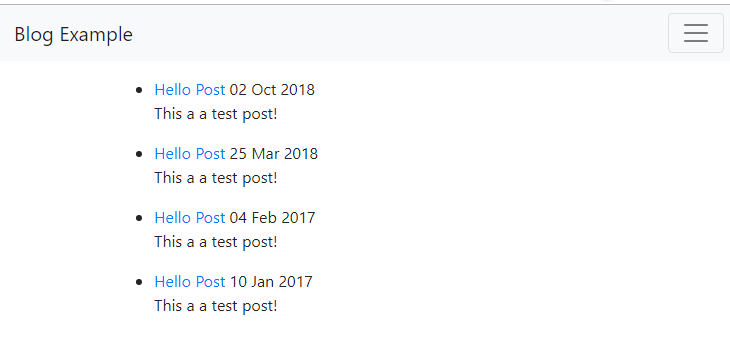
And when we build we now have the Bootstrap style included. We can then change the navbar to use Bootstrap navbar component.
1
2
3
4
5
6
7
8
9
10
11
12
<nav class="navbar navbar-expand-lg navbar-light bg-light">
  <a class="navbar-brand" href="/#">Blog Example</a>
  <button class="navbar-toggler" type="button" data-toggle="collapse" data-target="#navbarNav" aria-controls="navbarNav"
    aria-expanded="false" aria-label="Toggle navigation">
    <span class="navbar-toggler-icon"></span>
  </button>
  <div class="collapse navbar-collapse" id="navbarNav">
    <ul class="navbar-nav">

    </ul>
  </div>
</nav>
And we also add the JS necessary for the components to work:
1
2
3
4
5
6
7
8
9
10
11
12
13
14
15
16
17
18
19
20
<!doctype html>
<html>

<head>
  <title>{{ page.title }}</title>
  <script src="https://code.jquery.com/jquery-3.3.1.slim.min.js" integrity="sha384-q8i/X+965DzO0rT7abK41JStQIAqVgRVzpbzo5smXKp4YfRvH+8abtTE1Pi6jizo"
    crossorigin="anonymous"></script>
  <script src="https://cdnjs.cloudflare.com/ajax/libs/popper.js/1.14.6/umd/popper.min.js" integrity="sha384-wHAiFfRlMFy6i5SRaxvfOCifBUQy1xHdJ/yoi7FRNXMRBu5WHdZYu1hA6ZOblgut"
    crossorigin="anonymous"></script>
  <script src="https://stackpath.bootstrapcdn.com/bootstrap/4.2.1/js/bootstrap.min.js" integrity="sha384-B0UglyR+jN6CkvvICOB2joaf5I4l3gm9GU6Hc1og6Ls7i6U/mkkaduKaBhlAXv9k"
    crossorigin="anonymous"></script>
  <link rel="stylesheet" href="/assets/css/styles.css">
</head>

<body>
  {% include navbar.html %}
  {{ content }}
</body>

</html>
All variables of Bootstrap can be overridden. To override a value, we add a _variables.scss file under /_sass and we import it before importing Bootstrap.
1
2
3
4
/_sass
  - /bootstrap
  - _variables.scss
  - main.scss
For example we change the primary color:
1
$primary: yellow
Then we import it before importing Bootstrap:
1
2
@import "variables";
@import "bootstrap/bootstrap";
And that’s it, we can then leverage the other components of Bootstrap to build our blog!
Conclusion
Today we saw how we could create a blog using Jekyll. We saw the different tools provided by Jekyll, layouts, includes, data and posts that we can leverage to construct an easily maintainable website. Then we moved on to see how we could style it using sass and lastly we saw how we could use a sass framework like Bootstrap to style the blog. And that’s how the current site that you are looking at has been built! Hope you liked this post, see you on the next one!


