Create Test Suites With Postman And Newman

Postman is a free development tool which helps testing API. It provides a complete API testing desktop application allowing us to create requests, organise them in collections and write test assertions while also providing variables management at different levels, environment level, collection level or request level. On top of that, it can easily be integrated into our automated CI using Newman, the CLI for running collections. Today we will look at how we can create integration test suites using Postman and how we can use Newman to run the tests without UI interaction.
Postman
Postman is a fully free desktop API testing tool and can be download from its official website.
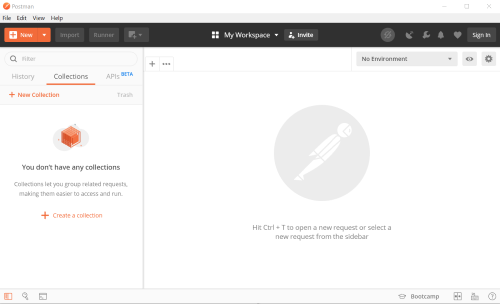
The UI gives us access to all the tools needed to start testing application.
Starting from the top menu:

Newprovides a quick access to add new elements, requests, collections, environments, and extra features which will not be discussed in this post (Mock server, monitor, etc..),Importprovides a way to quickly importJsonformat collections and environments,Runneropens a collection runner window, allowing us to configure a set of request to run, we will look more into it when discussing about collections,- The last
+icons is a shortcut to open new tab or windows.
Next the middle menu provides access to Workspaces.

My Workspacerefers to the workspace currently open.
A workspace is a place where collection of requests are saved. The default workspace is My Workspace which stores all local collections and requests. Postman allows teams to collaborate through team workspace where the workspace can be managed by multiple users. Collections can also be shared between workspaces which is helpful when a collection needs to be managed by multiple teams on their own respecitve workspaces. We will not dig into workspaces in this post as all the work we will be doing will be offline.
Lastly the menu on the top right identifies the current state.

- The first loading icon indicates whether the collections are being synced with the Postman server, it is off for us because we are not signed in,
- The antenna can be used to set a proxy to inspect requests,
- And the rest of the buttons are settings, accounts, etc…
On the bottom left, we have three icons

- The first icon toggles the collection panel, useful on restricted screen space,
- The second icon opens the search, allowing to search for keywords in requests and variables,
- The last icon opens the debugging console.
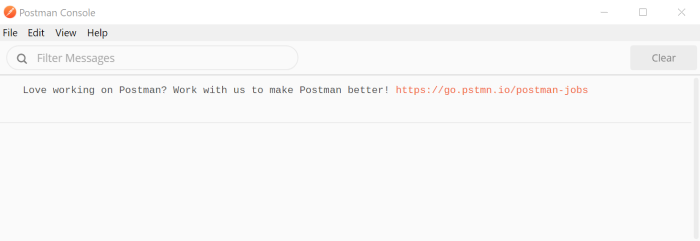
The debugging console is very important, it allows to quickly debug scripts which we will talk about later when writing tests.
The center of the application is what we will interact the most with.

It provides functionalities to configure:
- requests, where we can quickly put in place an HTTP request to test our API,
- collections, where we can create collections, save requests and arrange requests within those collections,
- environments, where we can create and manage environments, which are set of variables usable within our requests in different scenarios, typically local environment, QA environment and PROD environment.
Requests
Requests are the core functionality of Postman. We can create new request by click on the + tab (or CTRL + T). We can then select the HTTP method to use, specify the URL for the request and configure parameters, headers and body of requests.
Parameters are used to configure query parameters. When we enter the URL https://localhost:5000/api/values?id=10, Postman automatically detects that id is a paramter of value 10 and fills the table.

If we were to add params directly on the table, the URL will be automatically updated by Postman.
Simarly headers can be updated from the headers as key value. Authorization being the most commonly used header, or at least set of headers, for different sort of authorization, Postman provides a way to configure the headers required depending on the authorization type.
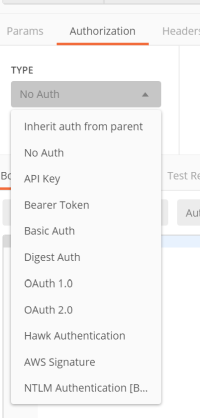
For example selecting a Bearer Token authorization prompts to specify a token.
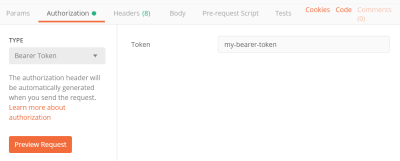
Preview Request will show how Postman configure the authorization. For Bearer Token, it is simply adding a single header Bearer followed by the token. But for more complex authorization, like AWS Signature, we would have more headers set.
Lastly a body can be specified, for POST request for example, where we can select the body type and content. Selecting the body type will add a Content-Type header automatically to the headers.
Once we are done with all the configuration, we can click SEND which will send the HTTP request as configured.
At the bottom, we can inspect the body of the request.
We left aside the test functionalities, Pre-request Script, Tests and Test Results. We will discuss it in the Tests section.
Collections
So far we seen how to create and configure request to test our API. Once we are done, we can save the request. Requests are saved in Collections.

A collection is used to:
- save requests under a meaningful container,
- setup configurations shared by all requests,
- serve as a test suite.

When hovering over the collection, we can see the right buttons showing the run icon for running all requests in the collection, and the settings icon to configure shared configurations in the collection.
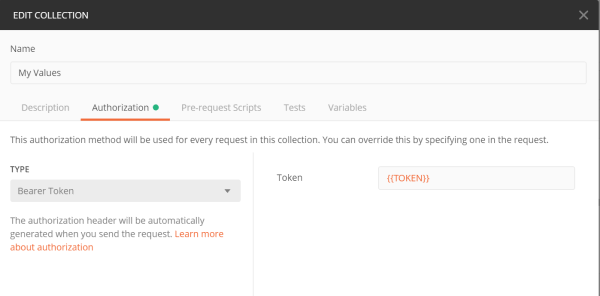
For example, we can configure an authorization for all requests in the collection.
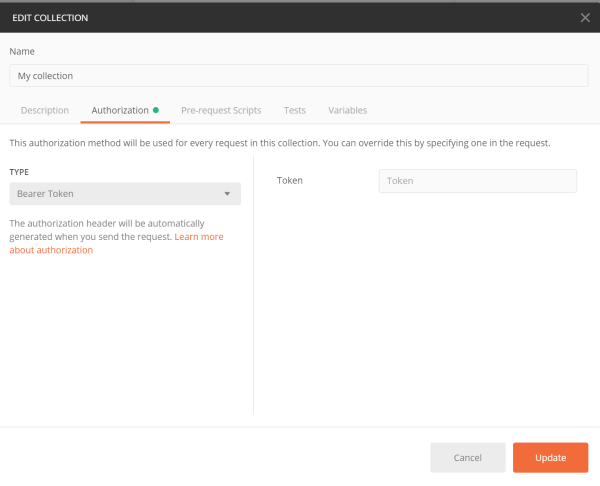
And then from every request under the collection, we can select Inherit auth from parent which will make use of the collection authorization setting. Specifying an authorization will override the parent authorization. For example, we can specify No Auth on a particular endpoint to override the collection authorization.
Sample API
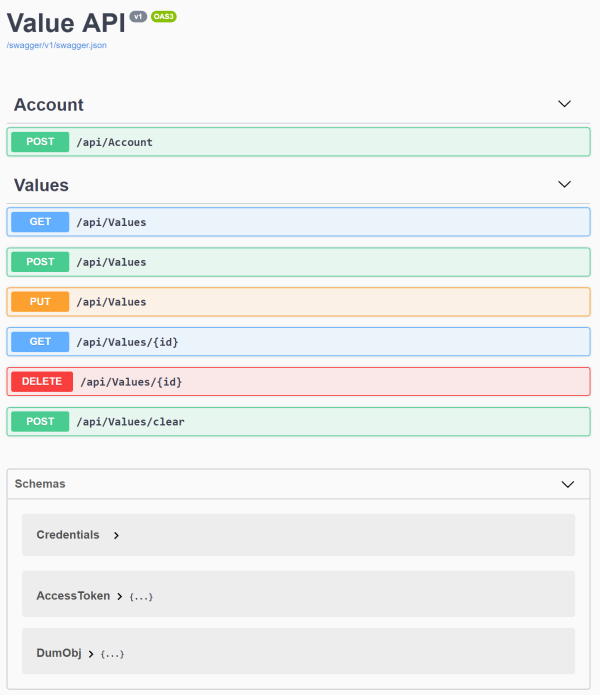
Now that we know how requests are created and how we can save collections, we are ready to create simple requests to test APIs. For the rest of the post, I will assume that we have a simple API which contains the following routes:
- Login
api/account, - Get all values
api/values, - Get a single value
api/values/{id}, - Post a new value
api/valueswith a body of json object with andidand avalue, - Put a value
api/values, - Delete a value
api/values/{id}, - Clear all values
api/values/clear.
The API can be found on my GitHub.
What we can do first is to create a Postman request under Postman collection of the name of the API. This will give us quick access to request to test endpoints while we are building the API.
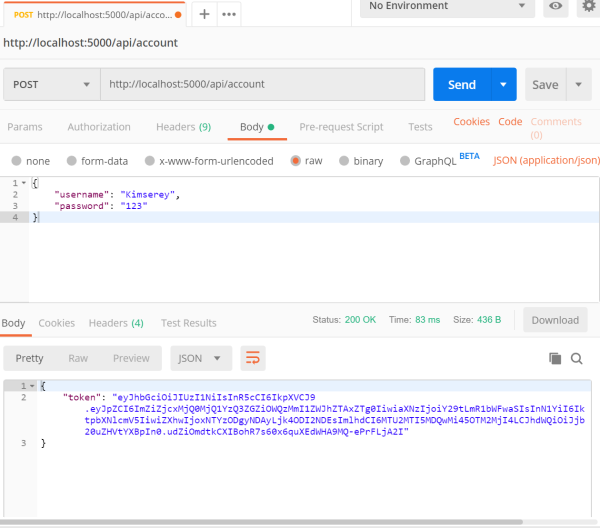
For example we can save a login request, a request to post a new value and a request to get all values:

Posting a value and getting all values are calls that need to be authenticated. Therefore before sending requests, we need to make a login request, copy the bearer token and then place the bearer token into the bearer header.
In this particular scenario, variables can be used to automate the whole process. After sending the login request, we can extract the token out of the response body and set it into a global variable which will be available for all other requests. This can be done using the Tests tab.
Creating Tests
The Tests section provides a way to specify post scripts which can be used for assertion. As opposed to Pre-request Script which are scripts executed prior the request is sent.
In the test script, we specify the following:
1
2
3
4
pm.globals.set(
    "TOKEN",
    pm.response.json().token
);
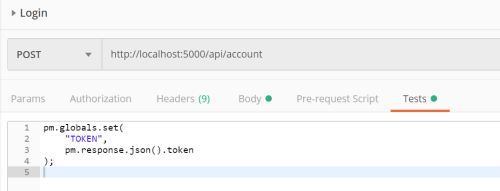
The first part sets the variable TOKEN to the token retrieved from the response body by using pm.response.json().token. The pm.response.json() parse the response body into an object where we can then access properties. More about the response API can be found in the documentation.
Running the login request will then set the TOKEN which we will be able to see from the variables on the top right.
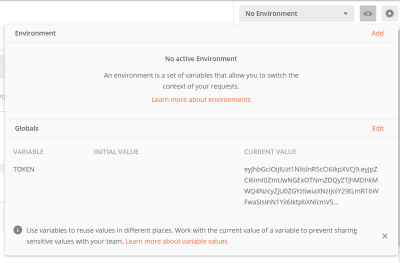
Variables are then accessible anywhere in Postman using the special form {{...}}. We can then modify our POST and GET authorization bearer to use {{TOKEN}}. And even better, we can set the authorization on the collection and set the request to inherit the authorization settings from the collection as we discussed earlier.
We will now be able to execute the requests as the authorization header will be set automatically with the token being filled by the variable. Within the script we can also specify test assertions:
1
2
3
4
5
6
7
8
pm.globals.set(
    "TOKEN",
    pm.response.json().token
);

pm.test("Successful login", function () {
   pm.response.to.be.success;
});
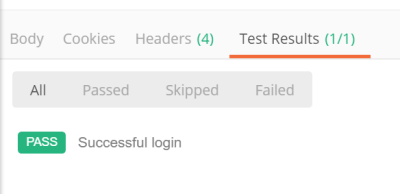
The second part of the script sets a test assertion on the response status code with pm.response.to.be.success. The pm.response.to.be.* is a shorthand for pm.response.to.have.status(code:Number) which can be found in the documentation. With the test setup, when we send the request, we will be able to validate the request by looking at the test results.
We can do the same for the POST and add an assertion on the result.
1
2
3
pm.test("Creation of value should be successful", function () {
   pm.response.to.be.success;
});
And we can also do the same for the GET:
1
2
3
pm.test("Getting values should be successful", function () {
   pm.response.to.be.success;
});
Now that we have one test per request, we can send each request individually, provided that we have executed the login first to save the bearer token in global variables. We can also use a quicker way to execute all requests in one click using the collection runner.

Clicking Run will open the runner and allow us to configure a test run by selecting which request needs to be executed and in which order. By default, all requests within the collection are executed in the order they are placed within the collection.

If an error occurs, the runner will report it on the UI. In order to get more details on particular run problems, we can use the debug console to inspect the requests and responses.

Lastly we can also use the Environment to save the hostname as HOST: localhost:5000 and name the environment localhost so that if we wanted to update the host to test against other endpoints, we would be able to do it easily.

Advanced Test Suite
Now that the basics of Postman:
- configure requests,
- configure collections,
- set variables in script,
- assert response body of requests,
- run a collection as a test suite.
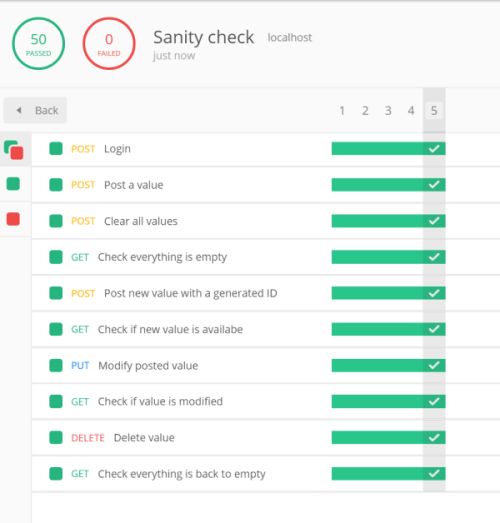
We can start to think about building a more elaborate test suite which will ensure that our sample API is working as expected. For example, a sanity check on the API would be a test which hits all endpoints with proper assertions set at each request.
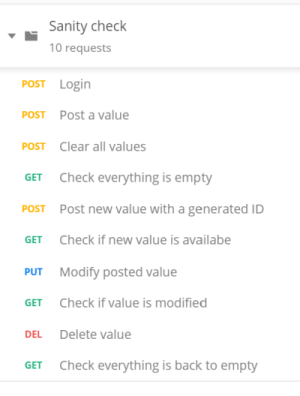
In order to test our API, we will execute the following steps in order:
- Login,
- Post a value,
- Clear all values,
- Assert that all values are cleared,
- Post a new value with a generated ID tracked,
- Assert that the value created can be retrieved,
- Modify the tracked value,
- Assert that the value has been modified,
- Delete the value,
- Assert there are no more values.
Such a collection will serve the sole purpose of executing a sanity check on the whole API therefore the collection can be named as such and we create the ten requests:
For 3., checking that the response body is empty can be done with pm.expect(res).to.be.empty.
1
2
3
4
pm.test("Expects response values to be empty.", function () {
    var res = pm.response.json();
    pm.expect(res).to.be.empty;
});
From 5. to 9., we create a value and track its ID from requests to requests. Therefore before sending the request, we fill up the body with a generated id which we save in variables, with pm.variables.set(), to make it available during the test run.
1
2
3
4
5
6
7
8
9
10
11
var id = require('uuid').v4();
var value = Math.floor(Math.random() * Math.floor(100));

pm.variables.set('ID', id);
pm.variables.set('VALUE', value);

console.log(
    "[" + request.name + "] "
    + "Generate test value: "
    + id + "/" + value
);
Console.log(...) will log information in the debug console, useful for debugging. We can use request.name to access the name of the request being executed. From the following GET in 6., we query all values and assert that we can find the value with the id saved in variables.
1
2
3
4
5
6
7
8
9
10
var id = pm.variables.get("ID");
var value = pm.variables.get("VALUE");
var res = pm.response.json();
var el = res.find(function (el) {
    return el.id === id;
});

pm.test("Expects id [" + id + "] to have value [" + value + "]", function () {
    pm.expect(el.value).to.equal(value);
});
In 7., we overwrite the VALUE set in variables with a new one which we use to update the tracked value.
1
2
3
4
5
6
7
8
9
10
var id = pm.variables.get('ID', id);
var value = Math.floor(Math.random() * Math.floor(100));

pm.variables.set('VALUE', value);

console.log(
    "[" + request.name + "] "
    + "Update existing test value: "
    + id + "/" + value
);
And on 8., we assert that the value was changed accordingly.
1
2
3
4
5
6
7
8
9
10
var id = pm.variables.get("ID");
var value = pm.variables.get("VALUE");
var res = pm.response.json();
var el = res.find(function (el) {
    return el.id === id;
});

pm.test("Expects id [" + id + "] to have value [" + value + "]", function () {
    pm.expect(el.value).to.equal(value);
});
Lastly with 9. and 10., we delete the value and assert that the test is completed. We can then run the test suite with five iterations and look at the summary:
Across all scripts, we have used the assertion API provided by Postman under pm.expect(). Underlying is the Chai Assertion Library which provide a readable way of creating assertion.
With that it is possible to test the result body with useful functions, for example:
1
2
3
4
5
6
7
8
9
10
11
pm.expects(pm.response.json()).to.have.property("hello");

pm.expects(pm.response.json().enabled).to.be.true;
pm.expects(pm.response.json().enabled).to.be.false;

pm.expects(pm.response.json().value).to.equal(10);
pm.expects(pm.response.json().value).to.be.within(1, 20);

pm.expects(pm.response.json().values).to.be.empty;
pm.expects(pm.response.json().values).to.have.lengthOf(5);
pm.expects(pm.response.json().values).to.have.lengthOf.above(5);
Newman
We now have a complete test suite which can be used to assert that our API behaves as expected. Each run of the test suite test all aspects of the API and running multiple iterations ensures that we are able to catch transient problems.
Our next step will be to automate the execution of our test suite. Do that we will use Newman the cli collection runner for Postman.
1
npm install -g newman
Using newman we can run a collection against an environment. We start first by exporting the collection and the environment as Json files.

and for the environment.

Then using Newman we can run the collection against localhost environment from our CLI.
1
2
$ newman run sanity_check.json -e localhost.json --bail -n 5
newman
-especifies the environment file,-n 5specifies that we want to run for five iterations,--bailspecifies that we want to halt the execution of the test suite if any test fails.
1
2
3
4
5
6
7
8
9
10
11
12
13
14
15
16
17
18
19
20
21
22
23
24
25
26
27
28
29
30
31
32
33
34
35
36
37
Sanity check

Iteration 1/5

→ Login
  ┌
  │ '[Environment] localhost'
  │ '[Login] Logging in to set token for next requests (Kimserey/123).'
  └
  POST http://localhost:5000/api/account [200 OK, 436B, 61ms]
  √  Token environment is properly set in environment

...

→ Check everything is back to empty
  GET http://localhost:5000/api/values [200 OK, 150B, 3ms]
  √  Expects response values to be empty.

┌─────────────────────────┬─────────────────┬─────────────────┐
│                         │        executed │          failed │
├─────────────────────────┼─────────────────┼─────────────────┤
│              iterations │               5 │               0 │
├─────────────────────────┼─────────────────┼─────────────────┤
│                requests │              50 │               0 │
├─────────────────────────┼─────────────────┼─────────────────┤
│            test-scripts │             100 │               0 │
├─────────────────────────┼─────────────────┼─────────────────┤
│      prerequest-scripts │              90 │               0 │
├─────────────────────────┼─────────────────┼─────────────────┤
│              assertions │              50 │               0 │
├─────────────────────────┴─────────────────┴─────────────────┤
│ total run duration: 2.2s                                    │
├─────────────────────────────────────────────────────────────┤
│ total data received: 1.99KB (approx)                        │
├─────────────────────────────────────────────────────────────┤
│ average response time: 5ms [min: 3ms, max: 61ms, s.d.: 8ms] │
└─────────────────────────────────────────────────────────────┘
Running the newman run commands will run the test suite and provide a summary at the end.
Docker Newman
Working with CLI can seem like a subtle point but it is what makes it possible to include our collection test suite as part of any CI. Newman also provide a Docker image which can be used to run the tool from a container by using the postman/newman image:
1
docker run -v "C:/Users/kim/collection:/etc/newman" -t postman/newman run sanity_check.json -e docker.json --bail
To run locally, we can change our environment from localhost to docker by simply updating the host address to point to the host address host.docker.internal:5000 rather than localhost.
1
2
3
4
5
6
7
8
9
10
11
12
13
14
{
	"id": "8caf4ddf-c7bc-43dd-b957-d3a146c98649",
	"name": "docker",
	"values": [
		{
			"key": "HOST",
			"value": "host.docker.internal:5000",
			"enabled": true
		}
	],
	"_postman_variable_scope": "environment",
	"_postman_exported_at": "2019-06-23T15:27:29.116Z",
	"_postman_exported_using": "Postman/7.2.2"
}
We mount our folder to /etc/newman which is the default working directory therefore we do not need to specify the path for our files sanity_check.json and docker.json.
And that concludes today’s post!
Conclusion
Today we took a deep dive into Postman. We saw how Postman could be used to execute API testing by constructing HTTP requests. We then looked into how to group requests into collections where we could set collection wide settings like authentication. We then looked into how scripts can be used to write test assertion as pre-scripts and post-scripts tests. And most importantly we saw how we could use scripts to set variables either local or at the environment level or global to carry data over multiple requests and assert on different aspects. Laslty we looked into Newman, the CLI companion of Postman which provides a way to run collection tests in the CLI expanding the possibilities as Postman can now be integrated into any CI pipeline. We can now think of different ways of organizing collections, one being for simple development testing, and other collections being dedicated for testing the API. In this post we concluded by creating a sanity check which would test all endpoints of our API. I hope you liked this post and I see you on the next one!


