Jupyter Notebooks With Visual Studio Code

Few months ago we talked about IPython, a powerful interactive shell to discover modules, test functionalities and applications. On top of that, IPython is also used as a Python kernel for Jupyter. Jupyter allows us to combine Markdown text with executable Python code in a notebook, called a Jupyter notebook. Visual Studio Code has a direct support for Jupyter notebooks which have the extension.ipynb (for IPython notebook). In today’s post we will see how we can create our first notebook and experience the benefit of this technology.
Setup the Environment
Create a virtual environment:
1
2
py -m venv venv
source venv/bin/activate
Then install Jupyter.
1
pip install jupyter
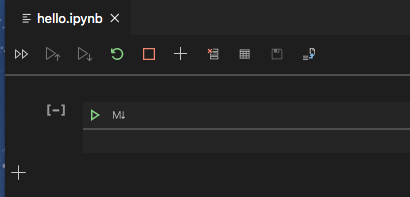
We can then create our first notebook and call it hello.ipynb.
When opening a .ipynb, VSCode will automatically open it in the notebook editor view.
Create a Notebook
After we created a hello.ipynb file, we can open it.
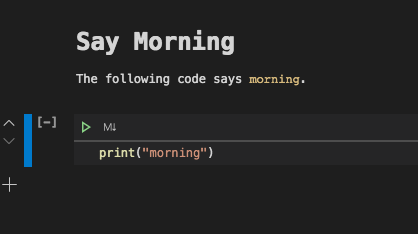
The notebooks are composed by cells. Each cell can contain either Python code, or Markdown text. Python code will be executable, while Markdown text will be displayed with proper format.
By default a code cell is shown. We can then write Python code in the code cell and execute it using the play button.
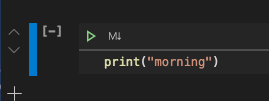
In order to change the cell to a Markdown cell, we click on the Markdown button (the M with the down arrow - Markdown) and the cell turns to a free text cell where we can add text. Once we exit the edit mode, the markdown text gets formatted nicely.
The play buttons exposed by VSCode provides the following functionalities in order:
- Run All: will run all the code cells,
- Run All Above: will run all code cells above the selected code cell,
- Run All Below: will run all code cells below including selected code cell.
On the left side of the cells, we have a status bar indicator where a blue solid bar means that we are in command mode, while a green bar means we are in edit mode. In both case the cell is selected. Depending on the selection mode, Jupyter offers different keyboard shortcuts allowing us to use the notebook almost like a regular Python shell without having to manually click on the play buttons to execute code.
Command Mode:
enter: enter edit mode,shift+enter: run cell and select below,ctrl+enter: run cell,l: add line countj to code,d, d: delete selected cell,o: Show or hide output.
Edit Mode:
esc: enter command mode,shift+enter: run cell and select below,ctrl+enter: run cell.
Lastly the notebook keeps track of the variables which can be seen by clicking the table icon on the toolba:
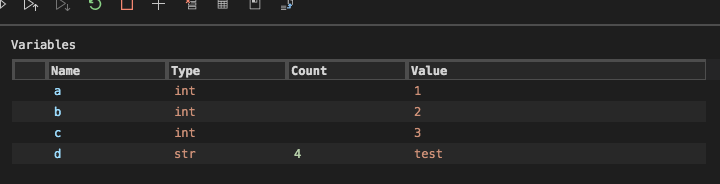
We can also restart or stop the Python interpreter so that we can clear the variables.
Example of Usage
If we were to explore SQLAlchemy, we could create a notebook with an initial Markdown explanation:
1
2
3
# SQLAlchemy Exploration

Create `engine` specifying the database engine. Here we use in memory sqlite. And create the declarative base which we use as a base class for our model.
Then a code cell:
1
2
3
4
5
6
7
8
9
10
11
12
13
14
15
16
17
18
19
20
21
from sqlalchemy import create_engine
from sqlalchemy.orm import sessionmaker
from sqlalchemy.ext.declarative import declarative_base
from sqlalchemy import Column, Integer, String

Base = declarative_base()
engine = create_engine('sqlite:///:memory:', echo=True)
Session = sessionmaker()
Session.configure(bind=engine)
session = Session()

class User(Base):
    __tablename__ = 'users'

    id = Column(Integer, primary_key=True)
    name = Column(String)

    def __repr__(self):
        return "<User(id={}, name={}>".format(self.id, self.name)

Base.metadata.create_all(engine)
and a second Marketdown cell:
1
2
3
## Creating a User

Creating a user and querying.
And lastly another code cell:
1
2
3
4
5
6
kim = User(name='Kim')
session.add(kim)
session.commit()

user = session.query(User).first()
print(user.name)
And this will result in the following notebook:
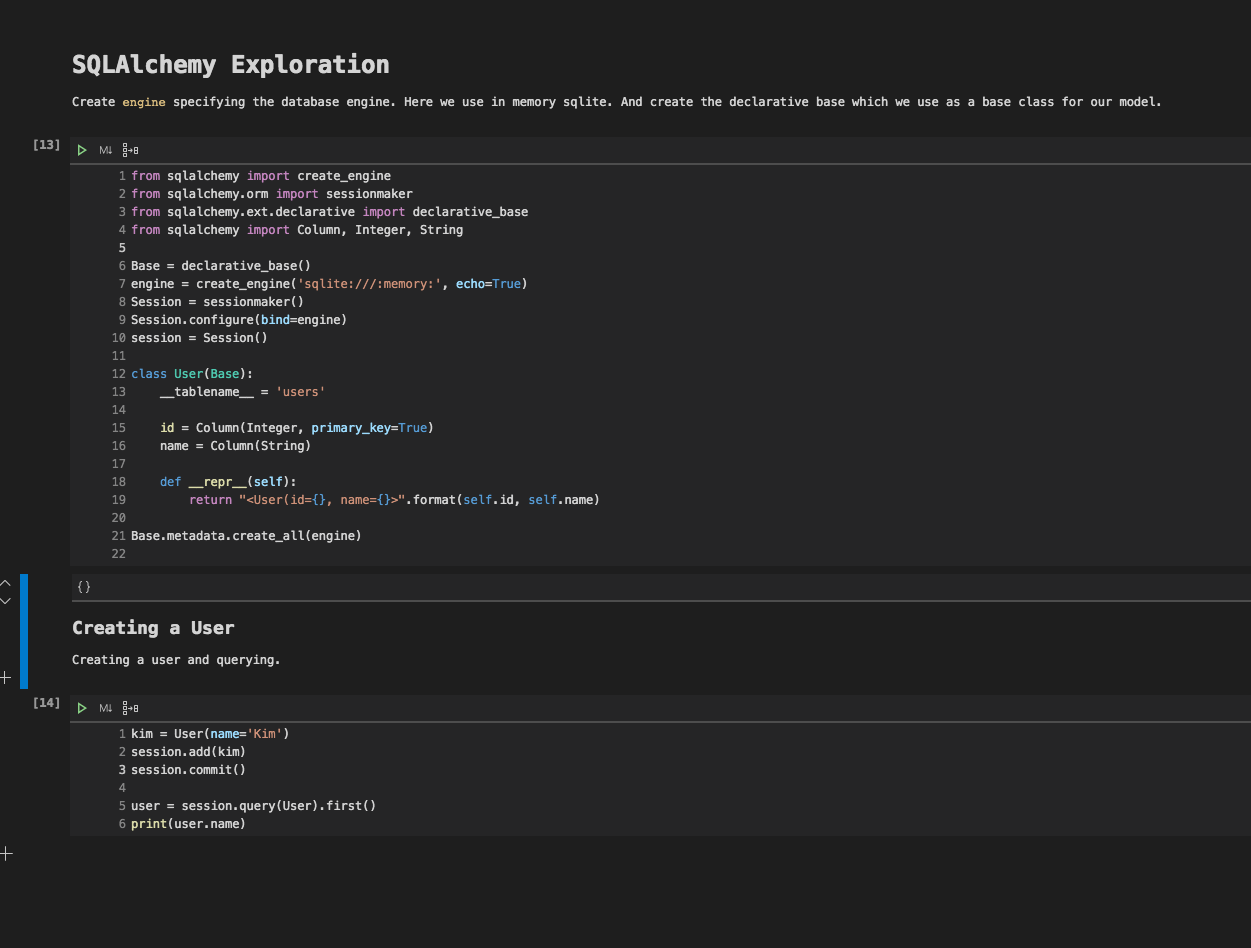
We can see that we endup with a mix of documented executable code!
Conclusion
Today we looked at Jupyter notebook. We started by looking at how we could install it, we then moved on to see how we could create a notebook on VSCode and looked at the different options we had, and we completed this post by looking at how we could use a notebook in a real example where we explored how to create a table and add/query data on SQLite using SQLAlchemy. I hope you liked this post and I see you on the next one!


